Friday, December 21, 2012
Vegan Moroccan Lentil Soup
This is one of my favorite soups to make. Apart from being fresh, healthy (and delicious!) it freezes well and is perfect to bring for lunch. I started making this several years ago and compiled the ingredients from a multitude of recipes. I don’t measure when I make it, but tried to come up with some basic values.
Please adjust to taste : )
Ingredients
Olive oil
2 onions, diced
2 bell pepper, diced
2 stalks celery, diced
4 cloves garlic
2 tomatoes, diced
1 can crushed tomatoes w/juice
Red lentils
1 can tomato juice (I use V8)
Water to cover (you can also use chicken or vegetable stock)
1 bay leaf
1 bunch cilantro
1/3 bunch parsley
3 tsp each ground cumin & coriander
2 tsp turmeric
1 tsp paprika
Pinch cinnamon & allspice
Salt & black pepper to taste
1 lemon, juiced & zested
1 Tbl fresh grated ginger
1 jalapeño, minced
Chop onions, bell pepper & celery and sauté with olive oil, salt and pepper until tender.
Add 3 minced garlic cloves and ½ of jalapeno and continue to cook.
Grate the fresh ginger.
Measure and mix dried spices together and rinse and sort lentils.
Add diced tomatoes, crushed tomatoes, lentils and V8. Add water until lentils are well
covered.
Add ¾ of dried spice mixture
and ½ of grated ginger. Add bay leaf, ½ bunch cilantro and ¼ bunch parsley (I
tie this together and create a bundle using the stems). Cook on medium-low heat
for 2-3 hours, stirring occasionally.
Once lentils are tender and the soup has cooked down, season to taste with salt and pepper and remove the remaining cilantro/parsley bundle. Give a few pulses with the immersion blender.
-->
Finely chop the remaining cilantro, parsley, jalapeno and
ginger (I used the food processor) with lemon zest, lemon juice, salt and
pepper and remaining spices. Stir about
half of this mixture into the soup and reserve the rest to garnish.
Add a dollop of the cilantro-spice mixture to each bowl before serving.
Food is love!
Simple Upholstered Headboard
It has been nearly a year since I have posted, and needless to say a lot has happened during that time. I finished nursing school, passed my boards and got my dream job in Gainesville. I feel so blessed to be near Beau and my family again.
My year of accelerated nursing at UNF didn't leave much time for cooking or crafting, but I did manage to squeeze in a couple of projects. My plan is to catch up with posts over the next couple of days in order to start blogging in real time for the new year... that's the plan, anyway :)
One of my first Jacksonville projects was a basic upholstered headboard. I left my bedroom set behind when I moved and wanted something to "dress up" my mattress on the floor.

Cost: about $12
Time: about 1 hour
Materials:
Lightweight wood for the frame
Ground cloth (for frame stability- screen material would also work)
Quilt batting
Spray adhesive
Upholstery fabric
Upholstery staple gun w/staples
Frame hanging hardware
Measuring tape/ruler
Upholstery pins
I made my frame 36 inches high and 60 inches long to align evenly with a queen-sized bed. I first upholstered the frame with ground cloth to provide stability and give a base for the batting and fabric. Although a wood back would be more sturdy, it would also be much heavier and require a more elaborate hanging system.

Cut a piece of quilt batting (I had some leftover from a quilt project- you can leave it out, but I like the look of a little loft under the upholstery) and attach it to the ground cloth with spray adhesive.

Cut your upholstery fabric to size. Position beneath the frame and upholster in place.

Nail in some upholstery pins around the border. I found these pretty etched silver ones at Jo-Anne's Fabric Store.

Attach hanging hardware on either side of the frame.

Fancy. Hang above the bed and enjoy!

Friday, June 17, 2011
Surgical Stomach Cake

I don't really know what to say about this cake. Perhaps nursing school has altered the natural line between "graphic" and "food." Proceed with caution.
 This is baking, Dexter-style.
I made homemade fondant using a marshmallow base. I didn't use an exact recipe, but instead went by consistency. I used marshmallows, vanilla extract, Grand Marnier, vegetable shortening and powdered sugar. If you color the fondant I recommend adding the coloring before the powdered sugar; it mixes more evenly and avoids scary rainbow hands.

I didn't have time to photograph step-by-step, but I made a basic yellow sheet cake, covered the top with fresh strawberries and poured tinted cream-cheese frosting over the top. The color is meant to represent a surgical drape :)

I filled the fondant stomach with macerated strawberries... Creepy.
I brushed the scalpels with extra silver dust to create a glisten.

Now we get creative.
Channel your inner psychopath.

I know.

I'm sorry.

I may have gotten a bit carried away with this project.

I created a laceration to release gastric/strawberry goodness.

Anyone hungry?

Monday, May 30, 2011
His and Hers Engagement Cakes

This September, my brother is taking the ultimate plunge and tying the knot. Congratulations, Ben and Megan! I couldn't be happier to welcome Megan into our family.

To celebrate, I wanted to bring them a cake... but I couldn't decide which type to make. The idea of a Bananas Foster cake had long been in the back of my mind, but I also had an enormous bowl of apples begging to be baked.
Growing up, my dad always said "if you have one cow, you may as well have a herd." You already have the equipment ready and have to care and feed daily, so why not have several for slightly more work?
This is how I feel about baking; hence, Ben and Megan received two cakes.

The bride-to-be would have a "princess" apple-walnut cake with cream cheese frosting, and the groom would receive a bananas foster cake with brown sugar frosting. Yum :)

Get some bananas...
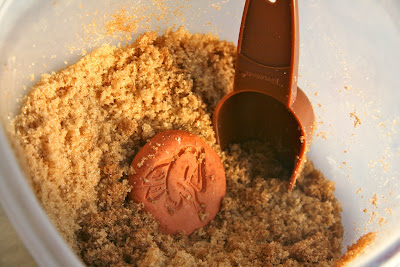
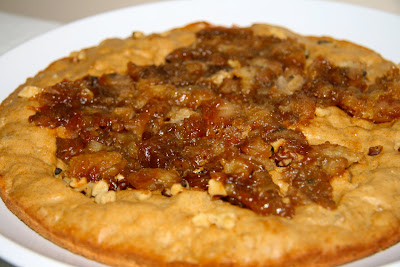
... and foster the crap out of 'em. Butter, brown sugar, bananas, banana liqueur and dark rum.

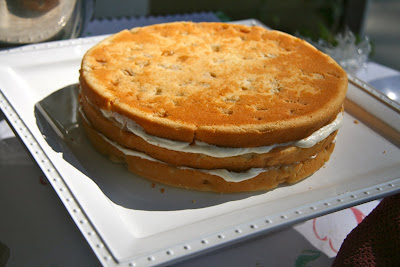
I used the completed bananas foster in the cake batter as well as between the baked layers.

For the frosting, I added some of the bananas foster (without the banana), Godiva Caramel liquer and extra brown sugar to a basic buttercream. The concentrated mixture served as the decoration.

I used the Magnolia Bakery recipe for apple cake. It was just okay... since making these cakes I have created a much better recipe, which I will post later.

Make some cream cheese frosting...


I find that adding a little extra frosting to the center layers helps when covering the sides.

Make sure the layers are even and apply a crumb coat.


Congratulations again, and enjoy your "BM" cakes! (hehe)
Subscribe to:
Comments (Atom)


